
Tag: houdini

We’re heading toward an AI collapse, where everyone and their grandmother can generate videos, images, and complex 3D scenes

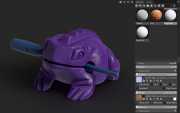
I’ve been using a lot Plasticity lately. It’s a simple CAD tool for surface modeling – much easier than Fusion 360 or MOI...
In Houdini, I usually assign color to primitives (though Houdini defaults to assigning it to “points”


I had to bake some texture maps in Redshift inside Houdini. Haven’t seen any clear tutorials on how to do that


How do you assign random colors from a specific set to objects and keep the setup flexible for changes with Houdini and Redshift?

If you want to search and replace paths in multiple locations use Windows -> Hscript Textport window


I was trying to optimize my coloring process for a project. And here is where I got right now


Small personal project that I made in Houdini testing Axiom GPU solver. Idea is that we always hunting for likes and “hearts”, setting traps with hot topics


I wanted to try Blender for a long time. And came across a series of tutorials from YouTube channel Blender 3d